
Most boat yards today are usually too busy turning out repair work to have time to build boats for either fun or profit. The work load always postpones boat building projects until “next year.” With the hope of making “next year” arrive sooner, I proposed building a boat, after normal working hours, at Dutch Wharf Boat Yard, where I’m employed. John Jacques, the yard owner, offered to provide the materials and shop facilities, and Walter Haddock and I (later joined by Vincent Falcigno) set out on a unique “spare time professional boat building project.” We decided that an open boat would be the most economical in time and material and that a traditional work boat type would be of greatest interest to potential buyers. The project was to be a test platform for some of our ideas on combining traditional and modern methods and materials.
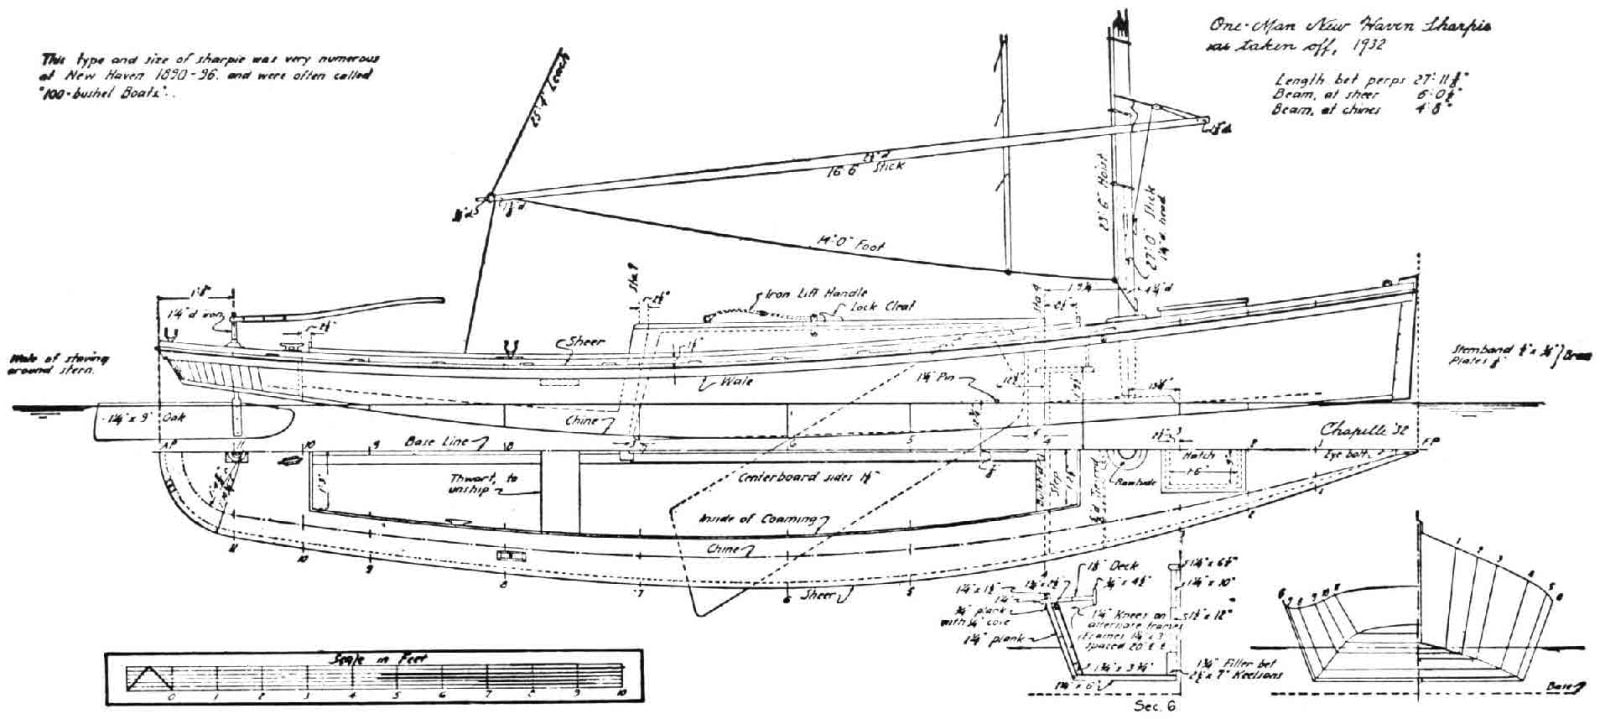
Construction began in January 1973 on a replica of the 28 foot New Haven sharpie from American Small Sailing Craft, published by W. W. Norton Co., New York (1951). Our choice of type was influenced by the reduced investment of time and labor required by the flat-bottomed hull and unstayed rig. In addition, the long water line and light displacement indicate a hull capable of rather spectacular performance under sail. The oysterman of a century ago valued his sharpie because it was fast, easily handled by a small crew and inexpensive to build for its length. We expect that the twentieth century boatman will find it a versatile daysailer easily trailered or beached, or pushed by a small outboard when not under sail. By reputation the sharpie’s sailing characteristics were rapid acceleration and the ability to approach planing speeds. It was actually an early type of high performance sailing craft.
Working New Haven sharpies were more or less standardized into two lengths: the “one man” or “100 bushel” boats with one mast (early boats were two masted), 26 to 28 feet overall length. The larger “two man” or “150 bushel” boat was two masted and approximately 35 feet long.
The plans of the two sizes and examples of the vessels are quite similar, they are narrow, flat bottomed boats with strong sheer and flaring sides, low freeboard, raking stems and round sterns. There are few of this neglected type surviving outside of museums despite the fact that there were sharpies actively fishing around New Haven into the 1930’s. Sailing craft fished the oyster beds of the Connecticut shore up to the mid 1950’s and it is possible that a few sharpies were in service right to the end of this period:
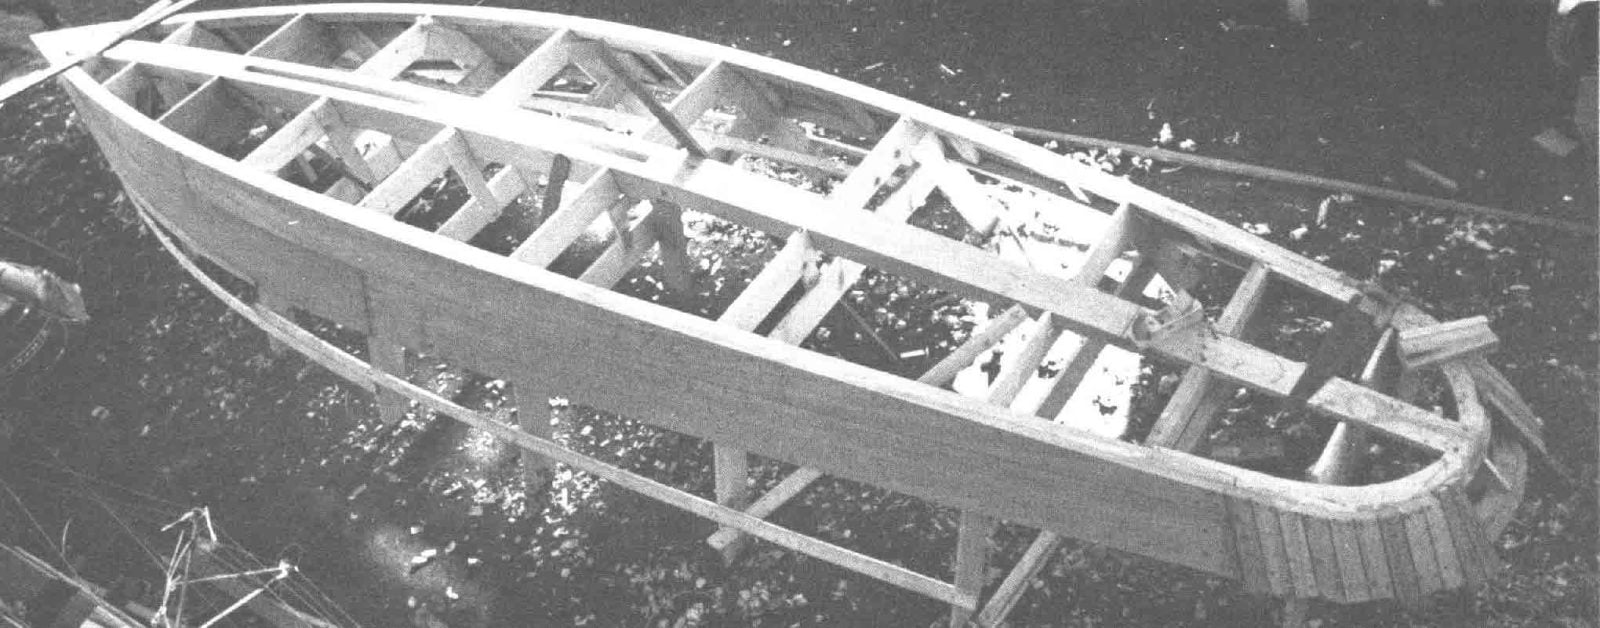
The lines were lofted on three sheets of ½ inch plywood, an easy enough job since the hull has only two lines to fair, sheer and chine in any view. Moulds were made from lumber yard #2 pine. Accurate lofting is worth the time spent since the ease of picking up patterns more than repays the initial effort. We followed an old builders’ practice of setting up the bulkheads at stations #4 and #10 in place of temporary moulds, a worthwhile saving in time.
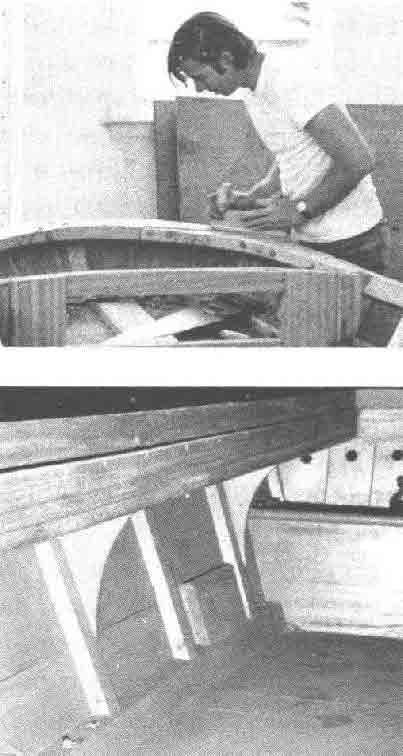
Hull construction is simple, and the heavy planking (1¼”) actually ties the framing together, whereas in more conventional flat-bottom construction, side frames are fastened to chine and sheer clamp to form a framing “system” to which the planking is then fastened.
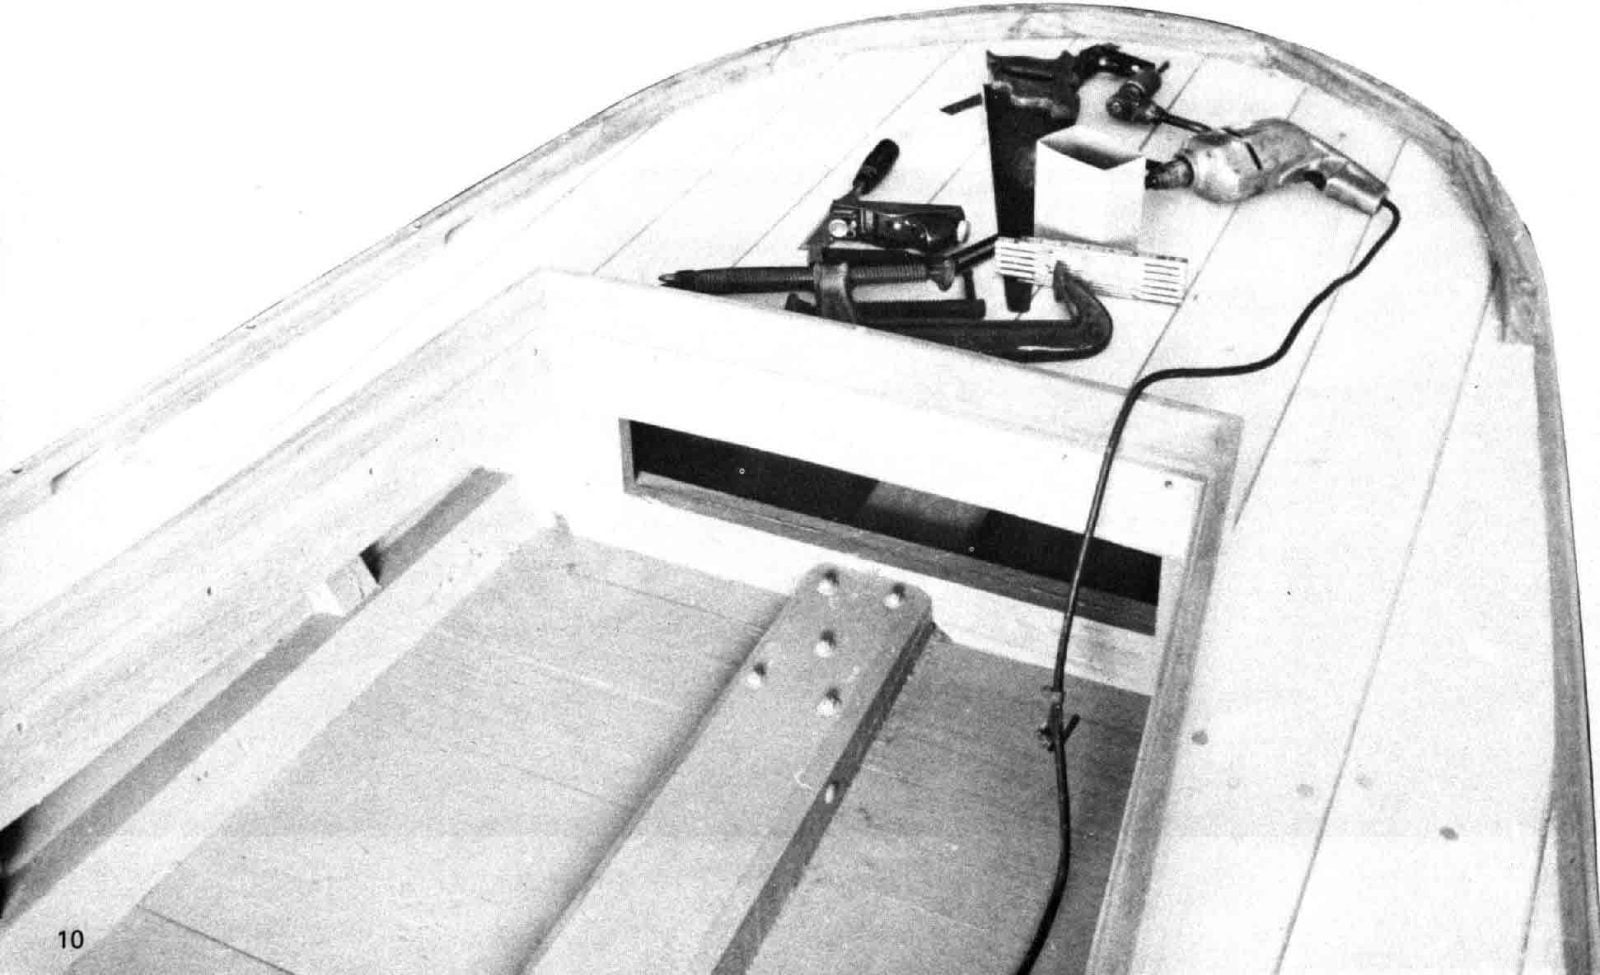
There are no frames at all in the cross-planked bottom. Many sharpies were built almost entirely of white pine with oak used for rudders, centerboards, side frames and rails. Pine and oak were both used for chines and sheer clamps. One sharpie at Mystic Seaport has a yellow pine bottom which was possibly a replacement for the original bottom worn out by the oyster shovels used to unload the catch. The keel was built up from two planks sawed to the bottom profile with a filler piece between them. The center board slot was formed by leaving out the filler in the way of the trunk. In our replica the keel and filler pieces were epoxy glued and bolted with galvanized carriage bolts which should last a lifetime since they are not in contact with the water. Clear fir was used throughout since we had no three inch pine available at the time. The use of glue here and elsewhere in the hull was to prevent joints from opening rather than for strength, for sharpies feature massive construction for their size and hardly need further strengthening. Vertical joints can be rot-breeding traps for dirt and water. The simplest type of boat deserves as much effort as necessary to keep water out of joints exposed to the weather. Particular attention should be paid to cockpits and decks since leaks in these areas are far more likely to lead to rot than leaks in the hull. The built up keel extends from station #3 to station #10 with an oak plank keel at each end running to bow and stern.
The complete keel and moulds were assembled upside down, plumbed and leveled. The plans indicated that the original of our boat had a softwood chine and sheer clamp since they were much greater in section than the hardwood timbers of the larger sharpies. These were gotten out of the same fir used for the keel and bent around the moulds. Had we used oak for the chines it might have been necessary to saw the aft section to profile because of the upward sweep of the chine aft of the centerboard trunk. The top of the chine was beveled to shed water and the bottom bevel cut after bending around the moulds. The scarf joints in the chine and sheer clamp were located in an area with as little curvature as possible to prevent unfair bends.
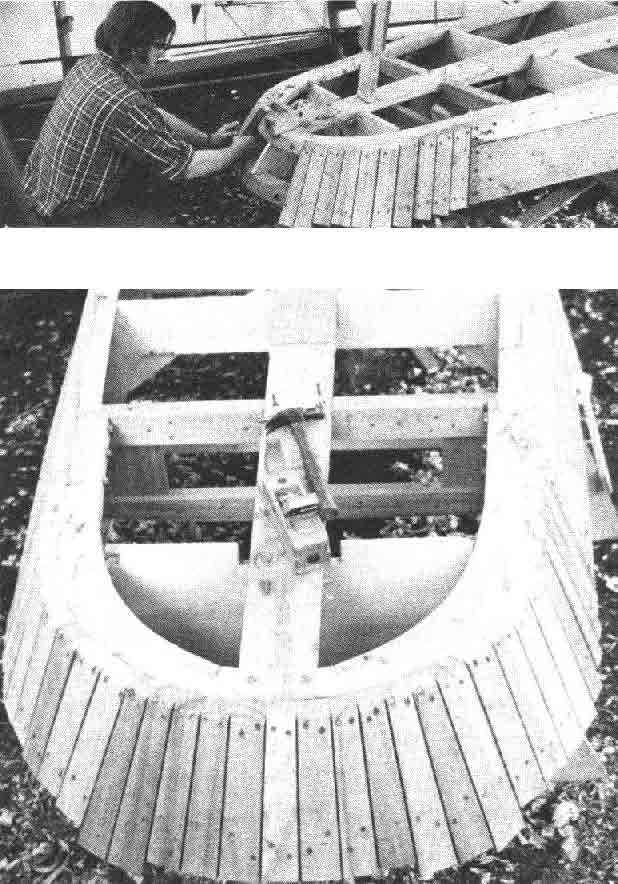
Framing the round stern was probably the most enjoyable part of the whole project. Top and bottom stern frames were laid out in the lofting work and full size patterns made for each piece. Like jigsaw puzzle parts the oak frame pieces were sawed to shape and the joints bolted together. Each flat U-shaped frame (five pieces in each), was bolted to the chine or sheer clamp. The bottom frame was beveled for the side planking while the upper or sheer frame had to be beveled for the deck crown as well as side planking. Bevels were roughed in when the individual pieces were cut out and faired to shape after assembly. The stem in New Haven boats was unusual in that it was a liner with the side planking mitered over it. The miter was then covered with a brass stem piece made from two plates welded in a vee shape.
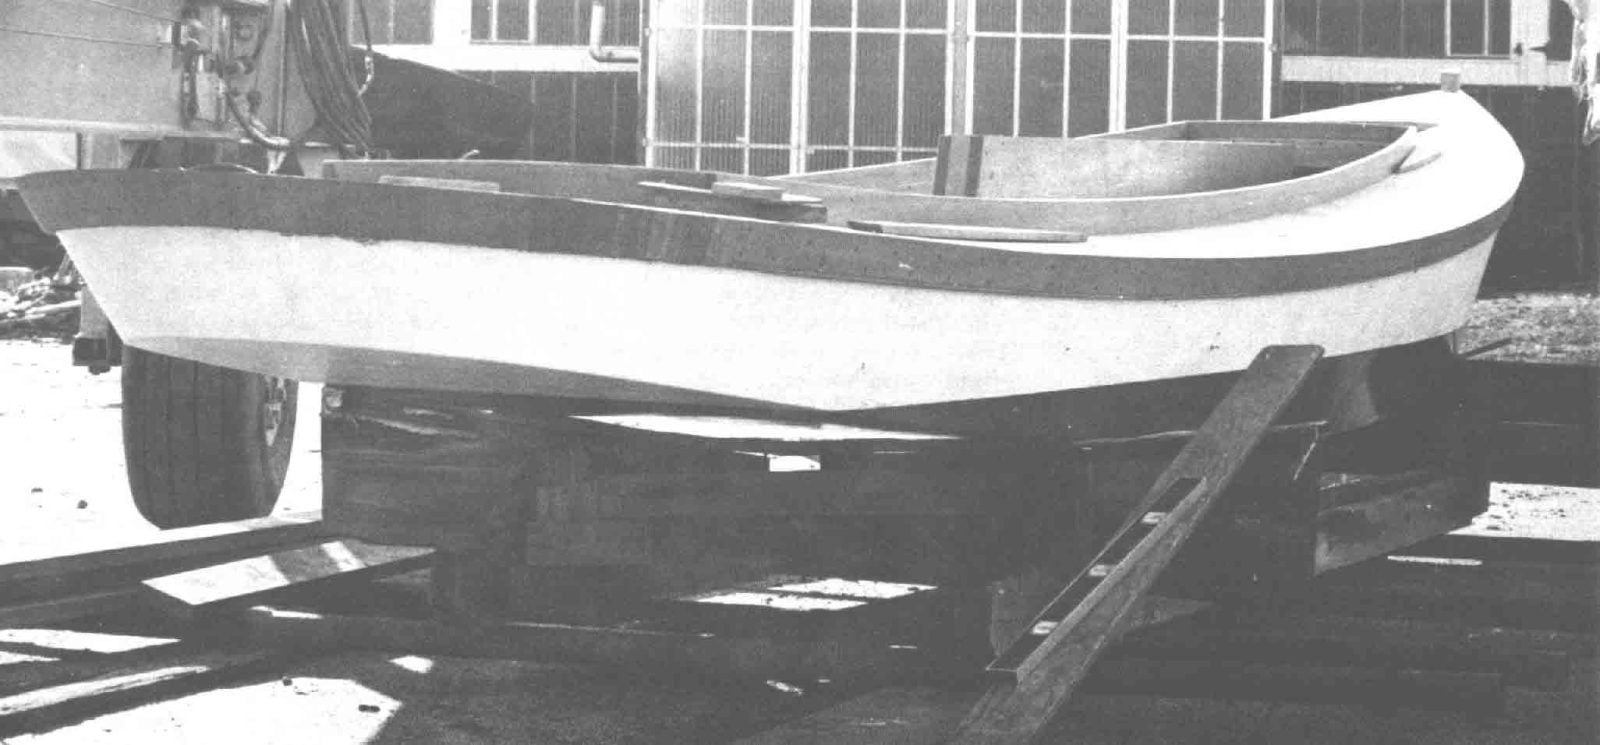
Side frames in sharpies were more like cleats than anything else; they butt the chine and sheer clamp and are simply nailers for the wide, heavy side planking which ties the frames and other structural members together. Full length sheer planks were optional, with some builders using clamps under the fore and aft decks alone. This partial sheer clamp served as a nailer for deck beams, but contributed little longitudinal strength. We toenailed the oak frames (1¼”x 3″, spaced 20″ center to center) to the clamp and chine before planking the sides.
We planked our boat with Phillipine Mahogany because it was the cheapest suitable material available at the time. Authenticity doesn’t really suffer, since at least one sharpie has a bottom of non-native wood, as was noted previously. Working sharpies were generally planked with wide stock so that two pieces made up the sides with a stealer closing in the bow. We did the same, fastening the side and bottom planking with Monel threaded nails. The nail heads were set and filled over with polyester putty. Oil base compound was used between planking and chine, polysulfide rubber (thiokol) around the centerboard trunk. We used a one-part material packed in cartridges, which is convenient for use in bedding or seam filling. The round stern was planked vertically, barrel fashion. The narrow staves were grubbed out to fit the stern frame with the outside faired off after planking. Since the sheer and chine have different radii, the stern planks are tapered slightly toward the chine. Raking the butt ends of the side planking also helps to reduce the difference in radius. Flat-bottom boats with straight sections are easy to plank and fair off when built upside down, and little planing is necessary. A belt sander will smooth the bottom and sides in short order. The hull was calked with cotton in the conventional way and the seams then filled with thiokol. The real advantage of thiokol cartridges for seam filling is the time saved over using the usual seam compound/putty knife method. We filled all of the hull seams in four man hours including clean-up time. The thiokol should eliminate seam cracking or seepage after prolonged dry storage, but a properly built and calked hull certainly does not need synthetic materials to remain watertight. At this point we had a completely planked hull which probably weighed 800 or 900 pounds and had to be turned right side up. Really large boats might pose special problems but a ten-man volunteer crew quickly picked the sharpie up and righted it so we could begin the deck framing.
Clear fir was used for deck beams and mast partners. Deck beams were dovetailed into the sheer clamps and nailed. Mahogany knees were fastened to every other frame to support the side decks. Deck planking was white pine from the local lumber yard, partly to keep topside weights down and because of the ease of working the soft wood. Work boat builders used pine as an all purpose wood for the same reasons. We grooved the plank edges on a table saw and fitted the grooves with splines. A calking seam was planed into the plank edge above the spline and filled with thiokol. Splining the deck planking may seem an unnecessary refinement on a flat bottom boat, but sharpie construction calls for wide spacing of deck beams (eighteen to twenty-one inches on this boat). Splines and the relatively heavy (1-1/8″) decking prevent the deck planks from “creeping” and opening up seams. Leaky decks would guarantee endless trouble resulting, ultimately, in expensive repairs. Quarter sawn stock is preferable for planked decks since swelling and shrinking is kept to a minimum. Quarter sawn lumber can be hard to come by and we considered ourselves fortunate in getting it for half of the deck stock.
Plywood makes a stiffer deck but requires more closely spaced framing. The cockpit coamings were fastened on top of the deck in yacht fashion instead of fastened to the deck edge as shown in the drawing. This method eliminates the vertical joint between coaming and deck and allows the coaming to be through bolted. Decks are important strength members in any hull, and especially so in these boats, since the sharpie’s large cockpit produces a tendency for the sides to “pant” or move in and out. The heavy thwart aft of the centerboard trunk was intended to prevent such movement and in this case was fastened permanently. Working boats had thwarts which unshipped to allow the catch to be shoveled out.
Work boats generally have heavy guard rails to protect them from rough use. Sharpies had in addition to the usual half round guard rail a “false wale” or thin plank three or four inches wide parallel to the sheer line. This was carried around the stern by vertical staving and a small bead was commonly used to dress off the bottom edge. We used mahogany instead of the usual oak, with both guard and wale bedded in thiokol and fastened with monel nails. The toe rail (also mahogany) was sawed to shape from short pieces of heavy stock going around the stern, although one length of steam bent oak could have been used, as was often done on the working sharpies. The toe rails were glued up and applied in one length for each side, bedding as usual in thiokol. Happily, scrap from the planking could be used for getting out the rails. The large number of scuppers shown in the drawing was probably to allow the decks to be washed down easily, since oyster tongs often carried as much mud as oysters aboard the boat. In conventional boat building the stem projects through the deck and the toe rails are fastened to it. The sharpie’s stem liner construction makes this method impractical. We sawed the stem flush with the underside of the deck, screwed and glued a false stem head on top of the deck and fastened the toe rails to it. This was common practice and gave the appearance of a conventional rabbeted stem. A simple hatch completes the deck structures. Ventilation of the forepeak area will surely be a problem even though we bored ventilating holes in the light bulkhead just aft of the mast. Either a grating or some method of holding the hatch partly open would provide the necessary air flow while maintaining the traditional appearance. Adequate ventilation will dry up dampness that would otherwise cause paint to peel and contribute to odors, mildew and possibly rot. We painted all interior surfaces to limit the absorption of moisture and dirt. Prior to painting, the interior and exterior were treated with a copper napthanate wood preservative as a second line of defense against rot. There are other preservatives which may be more effective, certainly some penetrate better than others. Many can be hazardous to the user when applied indoors, so caution should be exercised. Low initial moisture content and proper ventilation are two of the simplest and most effective methods of rot prevention.
The centerboard trunk headers were incorporated into the keel construction and the lower strake of the trunk sides was bolted on prior to planking the bottom. We used 3/8″ galvanized carriage bolts; these are available in lengths up to sixteen inches, which is useful for such structural work. The top strake was fastened with drifts made from galvanized rod and a full length cap fitted to the trunk. All joints were splined and set in thiokol with a thoroughly watertight trunk as the objective. Ultra light construction (not a problem with sharpies) seems to be the cause of trunk leaks in many centerboard boats. Carefully fitted joints, adequate scantlings, and proper fastening are necessary for watertightness.
We have attempted to build a long and troublefree life into the sharpie by supplementing traditional methods with modern materials where they were applicable. Although epoxies and polysulfides were used extensively, they would not in any way replace good workmanship or intelligent design. If it is difficult to reconcile the use of these expensive materials (we used about a quart of epoxy glue and 21 cartridges or around $65 retail of 1-part thiokol), they are a very small part of the complete boat. Glue was used in joints in rails or anywhere that a scarf must develop nearly the same strength as the original timber. Rails and cockpit coamings are supported partly by the surfaces they are fastened to and a 6 to 1 slope for the scarfed joint seems to work well. I have used a 12 to 1 slope on hollow spars where maximum strength is vitally important. It would be interesting but time consuming to build a boat with all joints glued and capable of bearing full load. Such a method might be desirable in extremely light construction but unnecessary in most craft. We could have cut the cost of thiokol substantially by using conventional oil base bedding compounds for all but critical areas, such as the centerboard trunk. I would still use it for hull and deck seams in new construction because of the saving in application time. The cartridges allow compound to be applied quickly and neatly with little waste. Bedding and glueing can make galvanized iron as practical as bronze for structural fastenings not in direct contact with water, at greatly reduced cost. Water and air attack an iron fastening at joints between timbers; between floor timber and keel for example. We often find in repair work that the iron is rusted out in this area but sound where it is embedded in the wood. Here the use of conventional oil base bedding compounds would help protect both the wood and the fastenings with little increase in cost. Where corrosion is more of a problem, as in plank fastenings, we used threaded monel nails. There was no difficulty getting holding in the sharpie’s heavy timbers, and nails are cheaper than screws any day. We used screws only where nailing was inconvenient, as in butt blocks. Presently the boat is complete except for spars, centerboard and rudder and general finishing work. No one has yet explained what keeps such a low, narrow and unballasted hull upright in a strong breeze. I expect to report on the boat’s sailing qualities after the sharpie is launched around the end of July. 