


Once, when I ran into trouble with a sputtering diesel engine, a friend passed along a bit of advice handed to him by one of his mentors: “If your diesel quits, first check the fuel. If it isn’t the fuel…then check the fuel.”
He meant this only slightly tongue-in-cheek. And, indeed, through years of mostly happy operation of diesel engines on auxiliary sailboats, when my engine has quit or faltered, the culprit has usually been a problem in the fuel system—water or other contamination in the fuel itself, a loose hose clamp, a clogged filter.
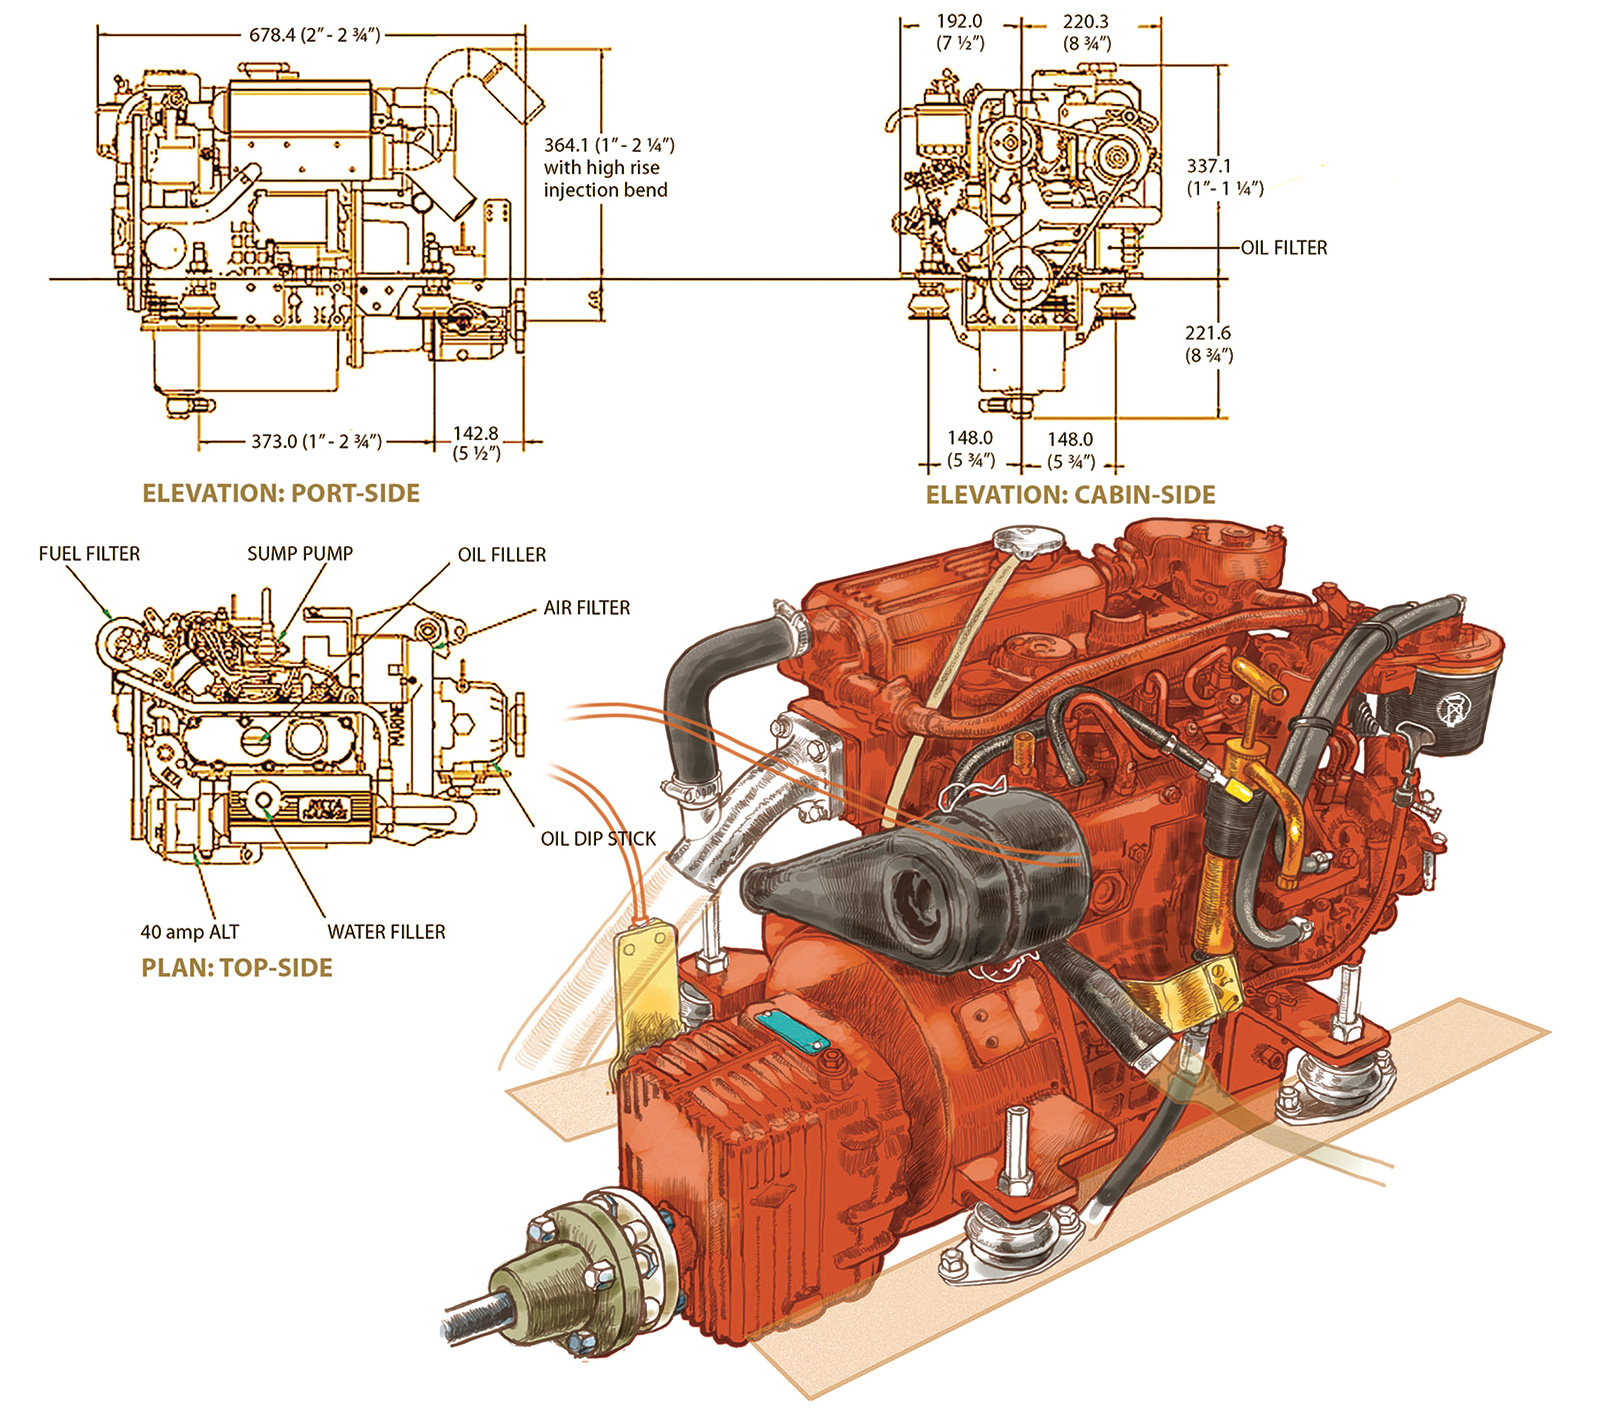
In 1893, Rudolf Christian Carl Diesel published his theory explaining the operation of an internal-combustion engine meant to be far more energy-efficient than the steam engines of his day. Soon thereafter, he built the first actual engines to his design. Diesel’s invention has a distinct advantage over gasoline engines in boats: their fuel, at normal atmospheric pressure, does not explode. Its ignition relies upon intense pressurization within the engine’s combustion chamber. Gasoline vapor, on the other hand, is highly explosive at atmospheric pressure, and if contained within a vessel such as a boat’s hull, it becomes a bomb when ignited. It also requires an electrical spark to combust, and this spark in turn relies upon an electrical system that can be compromised by salt and moisture. A faulty fuel system on a gas engine is dangerous. A faulty fuel system on a diesel engine is, generally, an annoyance. (Although it is not an explosion hazard, it can be a fire hazard.)
That annoyance—along with a few other common factors that can make your diesel quit—is the focus of this installment of Getting Started in Boats.
Fuel First Aid
If your engine quits, check the easy stuff first. That’s the advice of my diesel mentor, Jon Bardo, who teaches a class at WoodenBoat School called Making Friends with Your Diesel Engine. Jon is an expert in diesel repair. I am not, but I’ve had my fair share of them quit on me, and that’s what I bring to this discussion. And I have taken Jon’s class. He has vetted the advice that’s to follow and made important edits and additions to it. And he has advised me to “always check the first 90-degree fitting” after the fuel tank, for this is where debris is likely to accumulate first—and then move on to the filters.
A basic diesel installation has two fuel filters; they are called the primary and secondary filters. The secondary filter is affixed to a housing on the engine and has a part number specific to the engine. You can typically purchase replacements at auto parts stores or at marine supply stores. Buy two or three while you’re at it. It is good practice and cheap insurance to carry spares.
The primary filter, typically referred to by the brand name Racor, removes debris and water and is typically fitted with a transparent glass or plastic bowl on its bottom, to allow visual inspection. Such filters have replaceable elements rated by the size of particle they can remove; the typical sizes are 2, 10, and 30 microns. Follow the engine manufacturer’s recommendation when choosing a primary filter: while a 2-micron one might seem like a wise investment in maintaining ultra-clean fuel, it might also unacceptably restrict fuel flow.
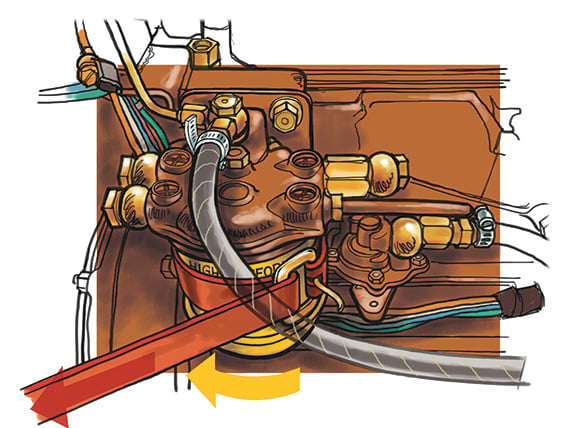
Here’s a little trick I learned as a kid, from Mechanix Illustrated: If you don’t have a fuel filter wrench on board, and need to remove a spin-on filter from your engine, use your leather belt for the job. Pass a loop of the belt through the buckle, and wrap the loop around the filter. The buckle should be pressed against the belt when the belt is pulling the filter counterclockwise. Give the belt a firm tug, and the filter should loosen. Remove the belt and spin the filter off by hand.
Fuel Polishing
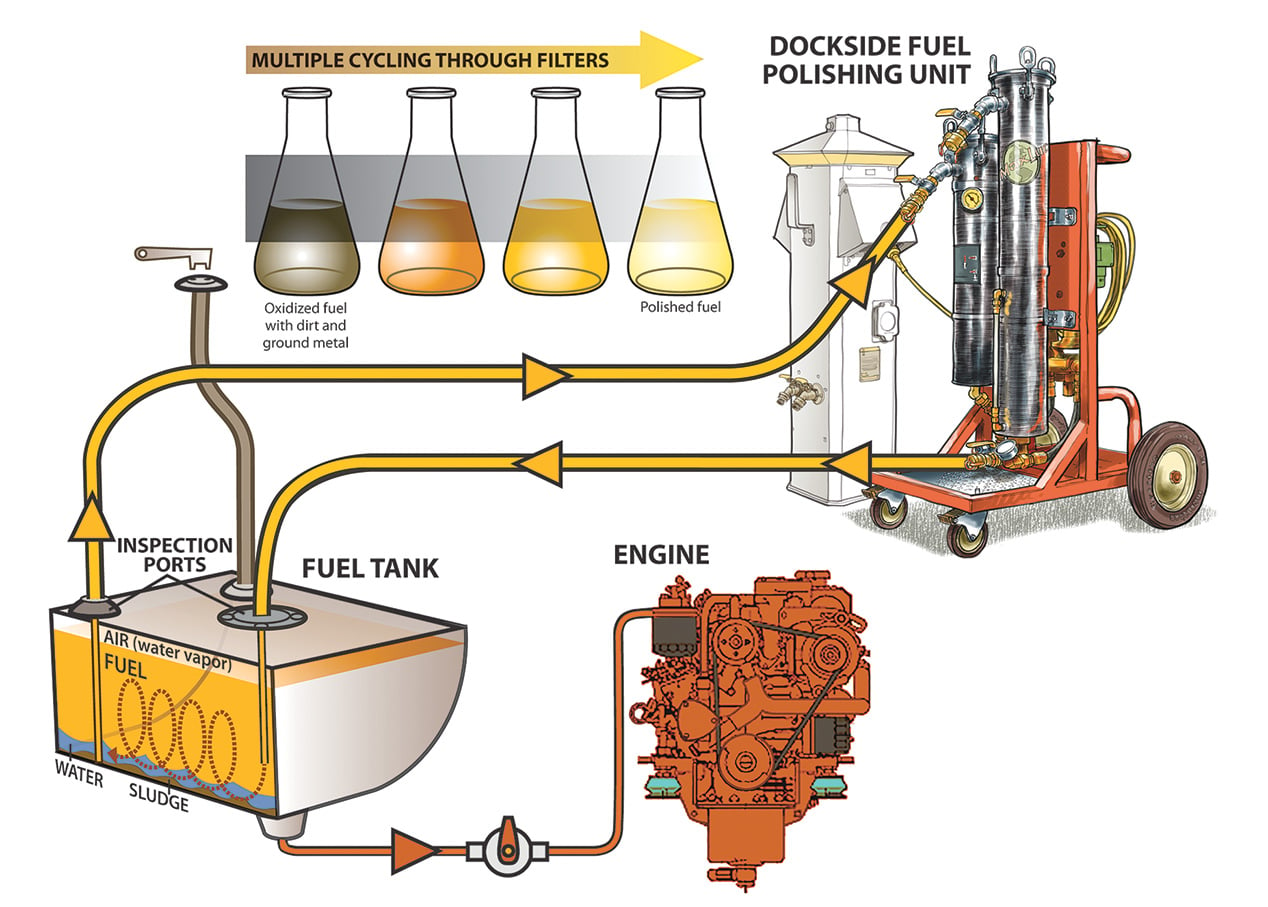
Algae grows in diesel fuel, and dead algae bodies can wreak havoc with a fuel system. If your boat has been run primarily in calm waters for many years and is then taken offshore in a seaway, algae sludge and other debris that has settled to the bottom of the tank can be kicked into suspension, overwhelming the filtration system and stalling the diesel. A simple filter change may not be enough, in this case, to fix the problem. This is a job for a professional fuel polisher.
Fuel-polishing is a dockside service that utilizes a mobile, multi-stage filtration device. The suction end of this device is placed in your fuel tank, near the bottom, and the return line is also placed in the tank, some distance from the suction end, about halfway down the fuel level. High-powered filtration ensues. The fuel is sucked into the polishing unit, cleaned, and returned to the tank under pressure, to stir up contaminants. The technician monitors pressure in the unit to gauge the state of its filters, and changes filters accordingly. When the pressure—a measure of resistance in the fuel filters—has dropped to an acceptable level, the fuel is clear of contaminants. The service typically costs several hundred dollars for a modest-sized tank—a small price for peace of mind.
Fuel Level
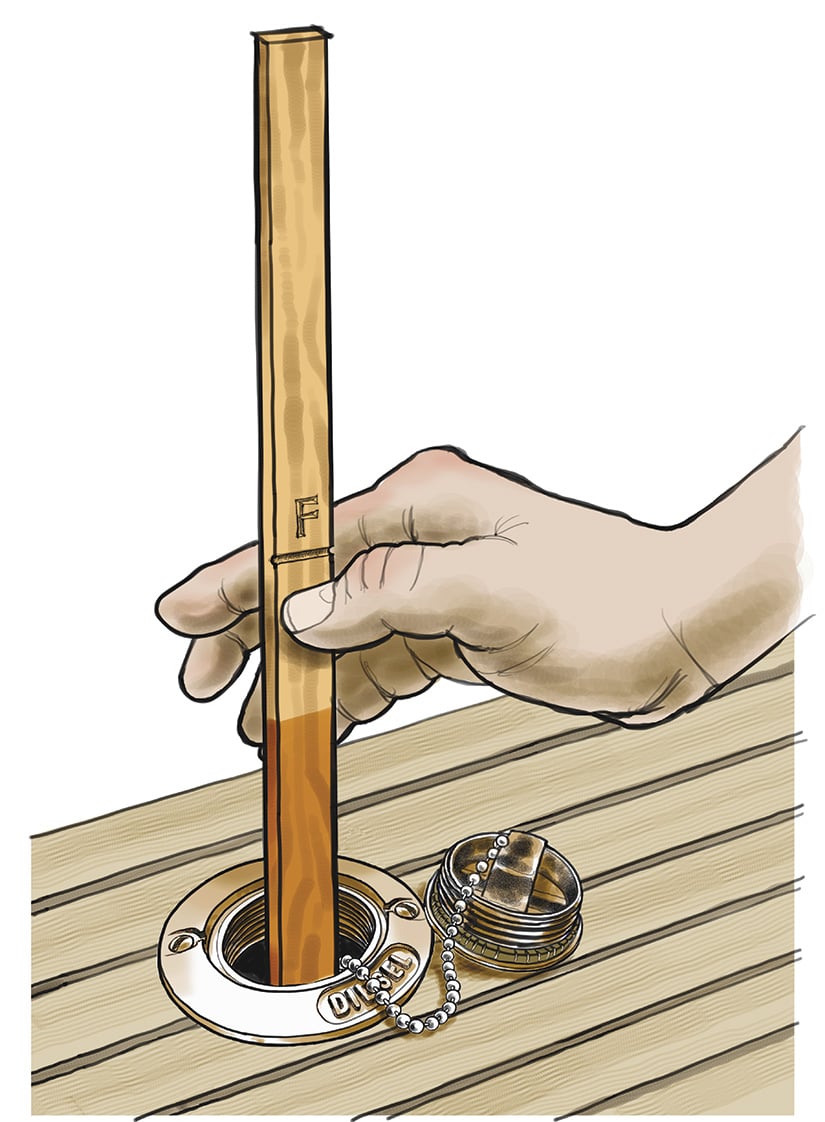
Airplane pilots like to cite three things that are useless to their aircraft: runway behind them, air above them, and fuel on the ground. Keep your tanks topped up. Monitor their level either with a fuel gauge or, if it’s convenient and possible, with a dipstick. A dipstick requires a short, straight run from the filler cap to the bottom of the tank. If your fill tube takes a curving route from the deck plate to the bilge, you need a gauge. A topped-off tank assures that you won’t get into the embarrassing, dangerous, and difficult situation of running out of fuel; it also dilutes contamination by distributing it into a higher volume of fluid.
What’s dangerous and difficult about running out of fuel? It’s dangerous because it happens at the most inopportune times, such as when making one’s way through a crowded anchorage or marina, or motorsailing away from a lee shore. It’s difficult because restarting most diesel engines after running them dry is not as simple as filling the tank and turning the key. A run-dry diesel’s fuel system must be bled in order to bring fuel from the tank to the injection pump to the injectors—which we’ll turn to next.
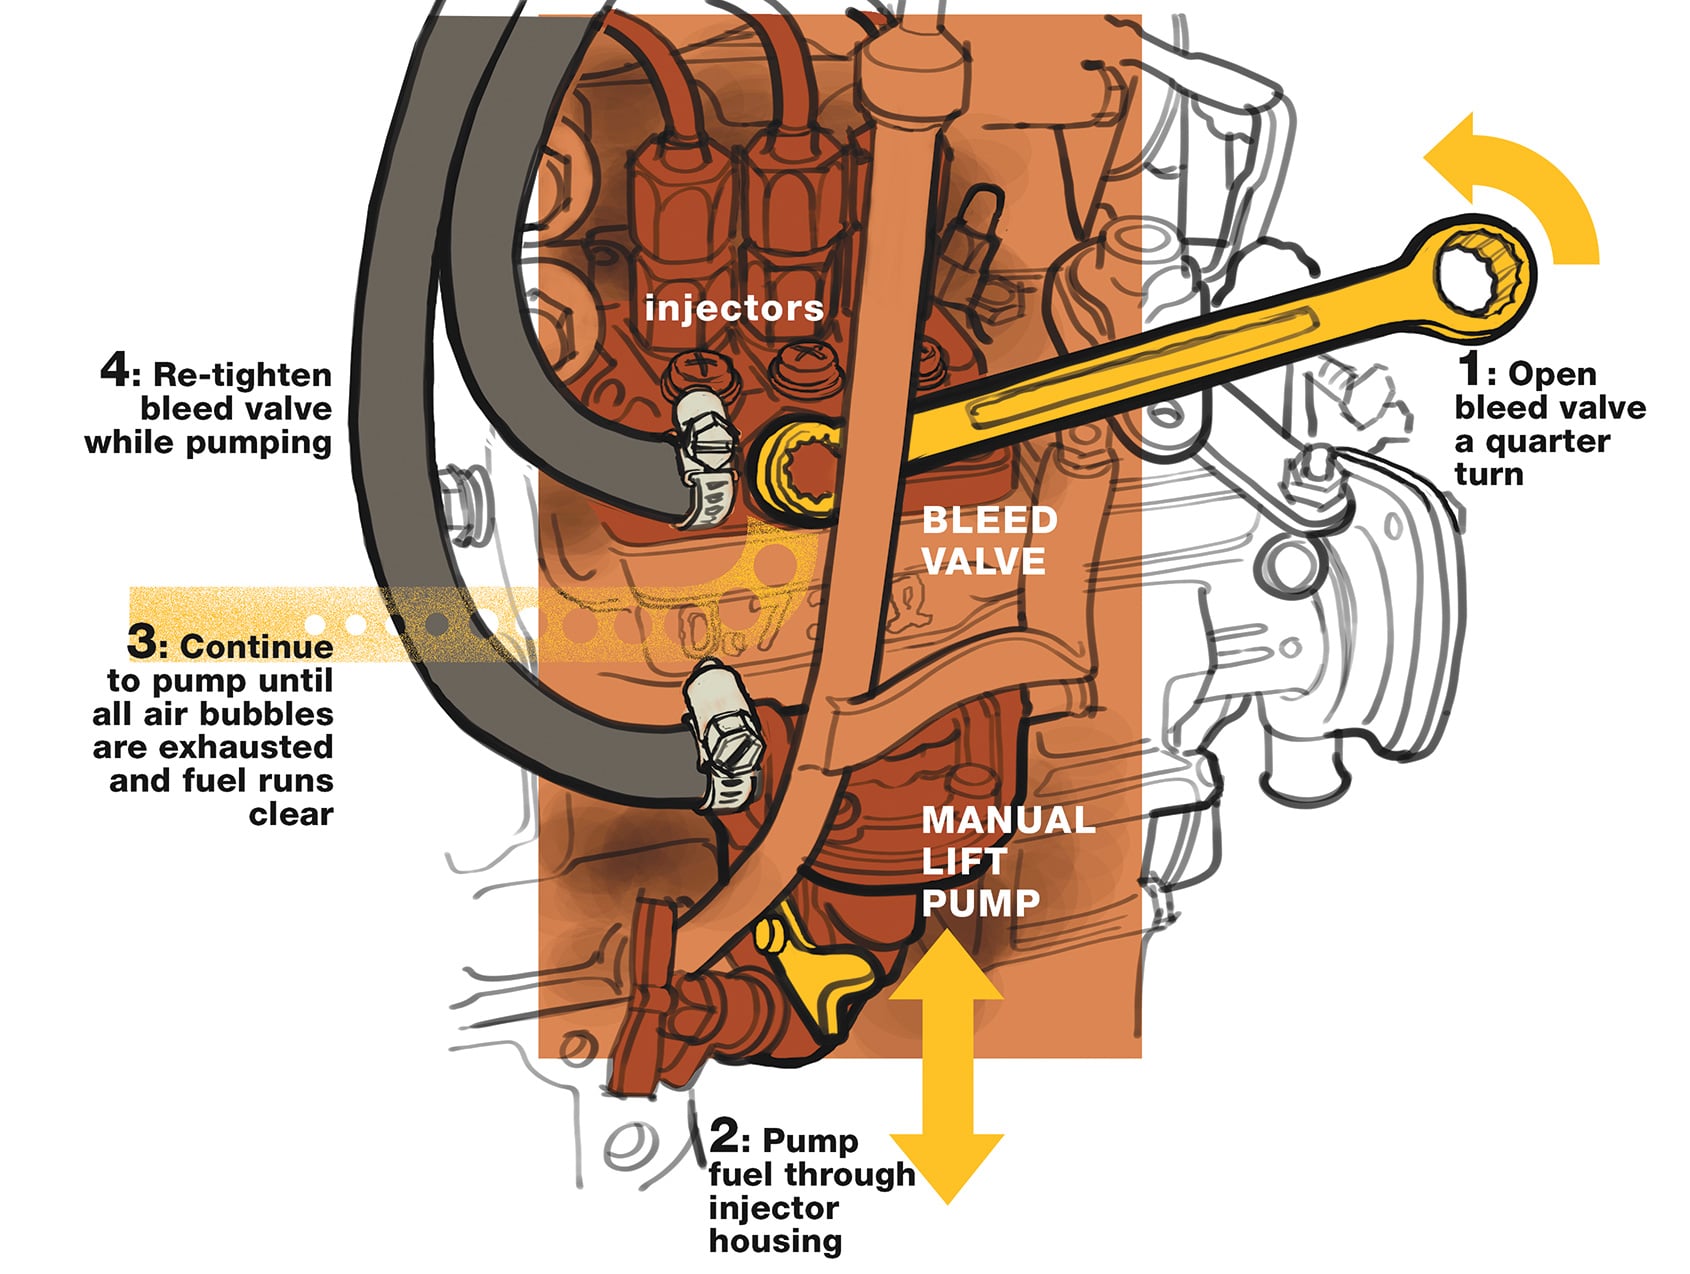
The fuel system has two pumps. One is a low-pressure unit that draws fuel from the tank. It is called the lift pump, and is either a cam-operated mechanical device that is part of the engine, or a low-pressure electrical pump that is peripheral to the engine. It delivers fuel to the second pump—the high-pressure injection pump. This pump feeds the injectors, which are atomizing devices threaded into the cylinder head, spraying fuel, at regular intervals, into their dedicated cylinders.
Bleeding requires that the manual lift pump be operated by hand (it has a little spring-loaded pump lever for this purpose), or that the electric lift pump be turned on. Some engines with electric lift pumps are self-bleeding, meaning that they technically do not require the process I’m about to describe. But although my last engine was nominally self-bleeding, I found that I could get it started quicker if I bled it.
The process involves following the manufacturer’s instructions, and opening and then closing a series of ports—bleeder screws—in the injection pump and secondary fuel filter housing, and perhaps even backing off the injectors slightly, or “cracking” them. Diesels are equipped with a “run/stop” lever to which is attached a shutoff switch, this lever must be in the “run” position for bleeding. Bleeding is then accomplished by operating the lift pump. Each of the bleeding stations should produce a foamy froth of fuel at first, followed by a steady stream of fuel with no air in it—which indicates that that station is sufficiently bled, and the port can be closed. An oil-absorbent rag, of course, should be placed beneath the engine to catch the drips, and then disposed of properly.
Fuel Line leak
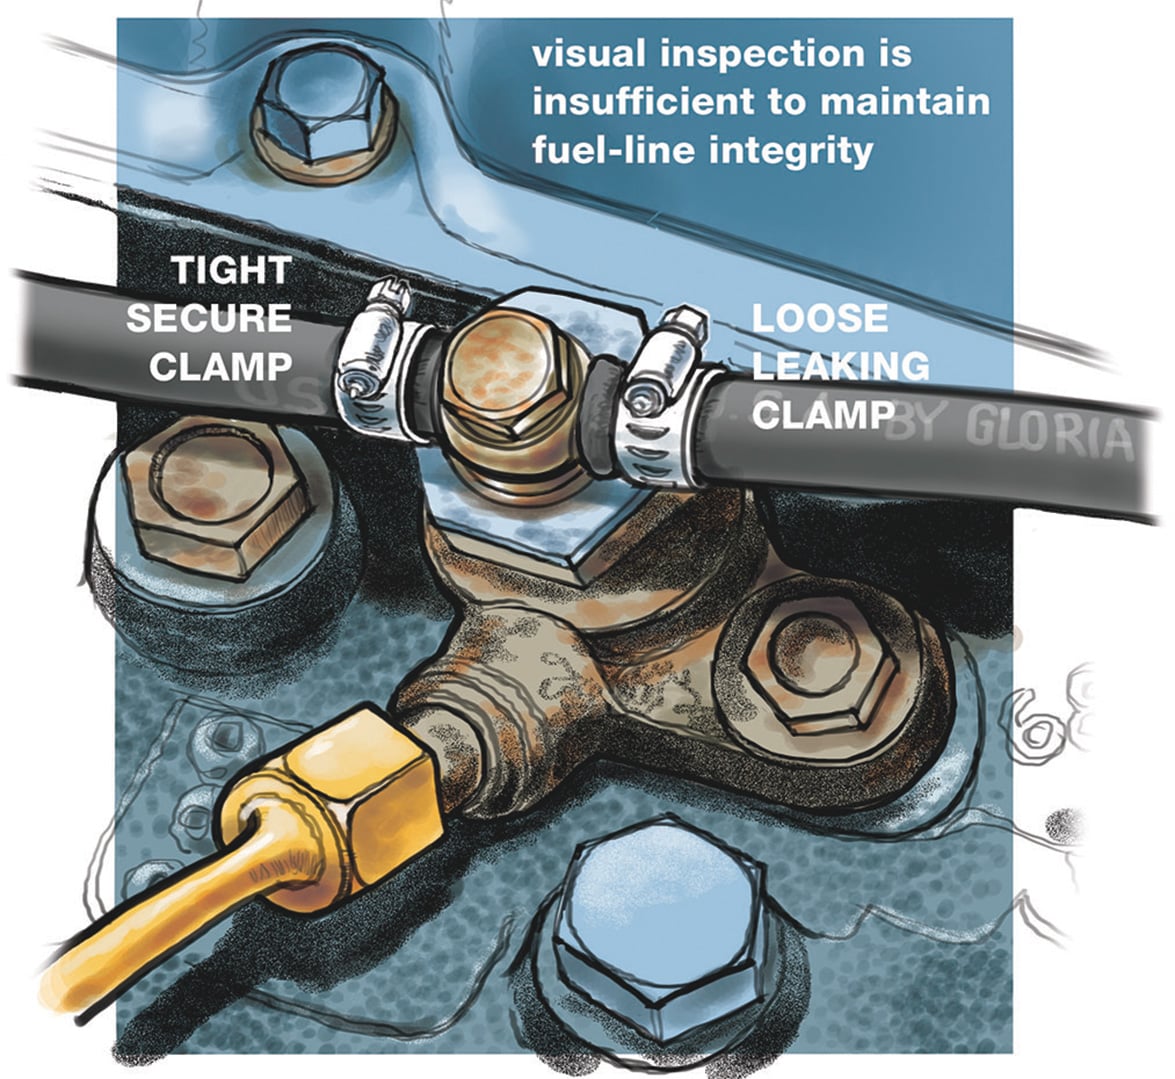
This happened to me once: I’d done some work on the fuel system—rerouted a fuel line—and could not get the engine to stay running afterward. There were no visible flaws in the system but, with the help of a screwdriver, I found one very invisible lapse in my workmanship: I’d left a tiny hose clamp finger-tight on the line running from the tank to the filter.
That line is located between the pump and the tank, so it is under suction rather than pressure. The lift pump pulls fuel out of the tank, through the primary fuel filter, and into its body; then it pushes fuel to the injection pump, which pushes fuel to the injectors. Any small air leak in the suction side of this system is going to draw in air, and diesels don’t like that. Check all of the hose connections in your fuel system; fasten them snugly. And be aware that some “push-lock” hose fittings do not use clamps—and that the use of clamps with them may even cause the fittings to leak air. Push-lock fittings have several barbs on their tubes; clamp connections have only a single barb at the tips.
Sometimes It’s Not the Fuel
Sometimes it’s not the fuel. Cooling-system compromise and lack of lubrication can also cause a diesel to quit unexpectedly—as can an electrical issue.
Electrical Issues
Although diesel engines do not rely upon electricity for their basic operation, the way gasoline engines do, they do have electrical components that can keep them from starting, stop them while running, or even stop them from stopping.
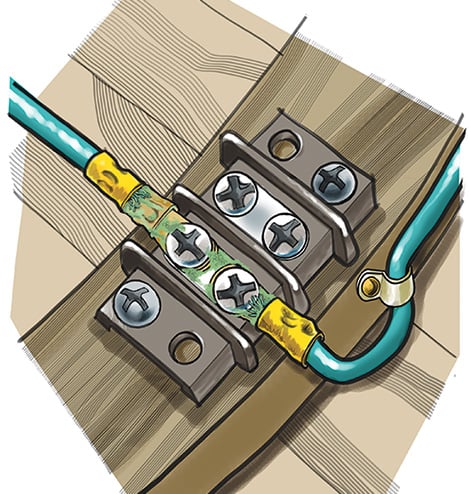
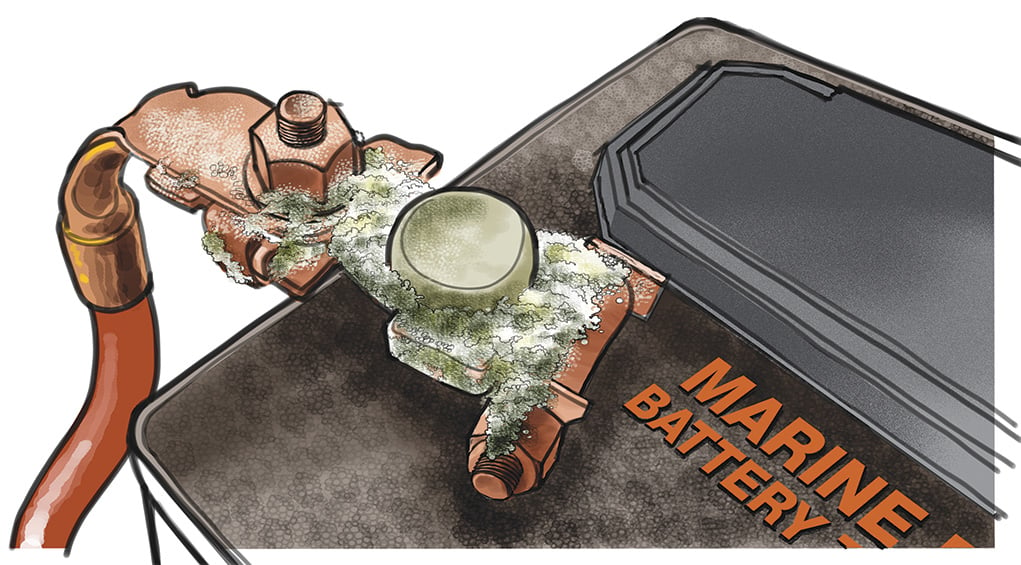
Starter: The most obvious culprit in the keep-them-from-starting department is the starter itself. This high-torque electric motor has a geared shaft that engages the engine’s flywheel to spin the engine—which gets fuel, air, and oil flowing—until the engine itself takes over and the starter motor goes dormant. A dead or dying battery, or a corroded terminal at the battery or starter, or at the key switch (technically, it’s not an “ignition” switch) can cause this starting system to fail. Inspect it carefully—motor, fuse, connections, battery, switches.
Glow plugs: Most diesels today are equipped with glow plugs. These devices temporarily heat the combustion chamber of a cold diesel engine, to assist with a cold start. If the engine is warmed up, they are not needed—though typically the glow plug button must be depressed along with the starting button in order to get the engine to spin. If the engine is slow starting or does not start at all, or if it spews white smoke until it warms up after starting, then you could have faulty glow plugs. Inspect and replace them, if needed.
Lift pump: Many diesels have an electrical lift pump, rather than a mechanically actuated one. Electrical connections are fragile in the marine environment—especially in engine spaces. If your engine seems to be not getting fuel to its injectors, and you have an electric lift pump, inspect its connections. If they seem okay, disconnect the discharge hose from the pump, place a container under the exposed discharge, and operate the pump. If fuel is not flowing, the pump’s internal filter—which is a screen or small filter element—might be clogged. Disassemble, examine, and clean it if necessary. If all else fails, replace the pump.
Electrically operated kill switch: Diesel engines require a kill switch—a device that shuts off the flow of fuel from the injection pump. Such switches are sometimes solenoids—electromagnetic rams that engage a run/stop lever on the engine. It’s good to know the location of this lever, so if your kill switch fails you can shut the engine off easily by hand.
Cooling System Issues
Your engine is either directly cooled with the water in which the boat is floating—so-called “raw water”—or “freshwater” cooled. Both systems use the surrounding seawater to cool the engine, but in different ways.
In either case, raw water enters the cooling system via a hose connected to a through-hull fitting equipped with a strainer that filters out coarse debris. The through-hull should be equipped with a seacock, allowing it to be shut off in the event of a failed hose—or if you need to service the cooling system while the boat is in the water.
In a raw-water-cooled engine, the cooling water pumped in from outside the boat flows through passages in the engine block. In a freshwater-cooled engine, the seawater enters a heat exchanger, which acts much like a car’s radiator: it bathes a collection of copper pipes through which flows a mixture of antifreeze and fresh water, carrying heat away from this mixture. In both systems, the raw water, after it has done its job, mixes with the exhaust in a “mixing elbow” attached to the exhaust manifold and is expelled along with the exhaust.
In a freshwater system (also known as “closed cooling”), the antifreeze-and-freshwater mix is the only cooling medium that touches the actual engine, protecting it from the corrosive effects of seawater. If the boat is operating in a freshwater lake, this is not a concern; in the ocean, closed cooling greatly extends the engine’s life by minimizing the buildup of rust and scale in the engine.
Several things can go wrong with closed and raw-water cooling systems.
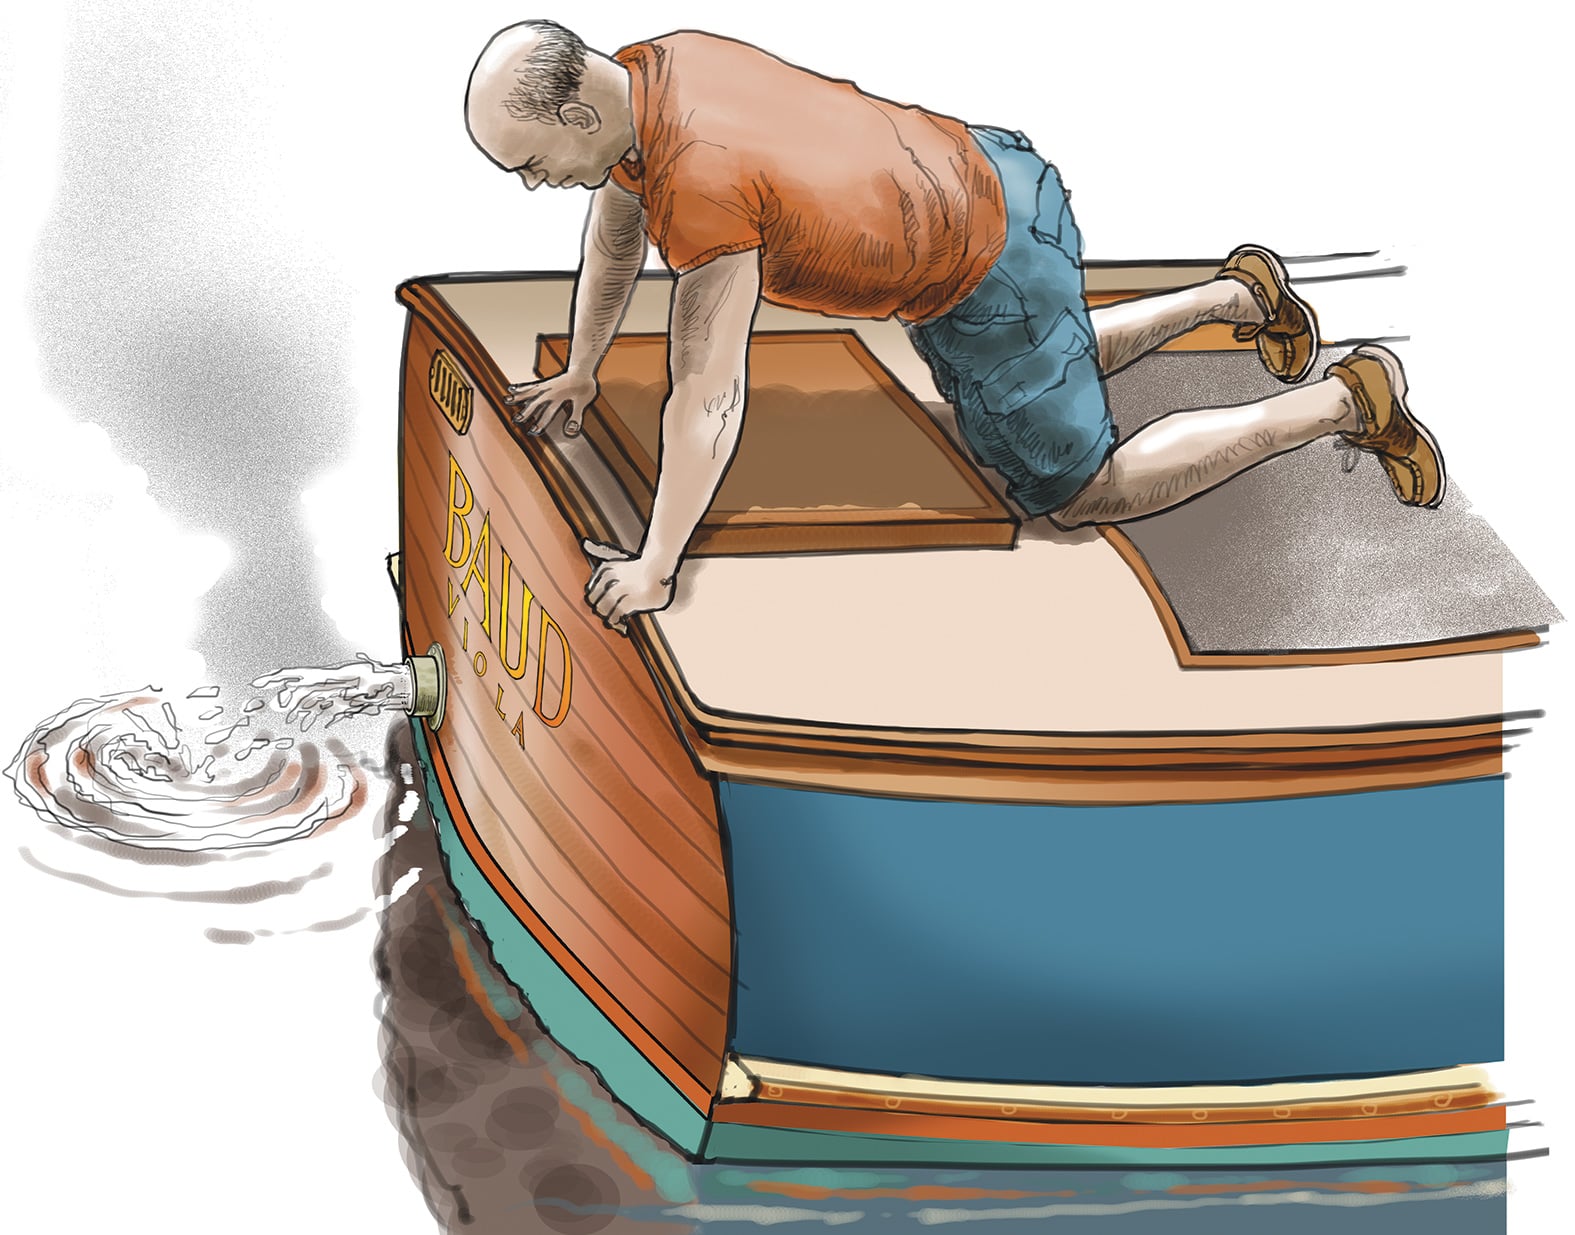
Closed seacock: It is good practice to close a boat’s seacocks—except for the cockpit drains—during idle periods. But it is also easy to forget to reopen them when you start the engine. This will starve the engine of all-important cooling water and cause it to overheat. If that happens, in just a few minutes the rubber impeller that drives seawater through a heat exchanger will be damaged. If this is not caught in time, pieces of the impeller will break off and become lodged in the heat exchanger. It then won’t be enough to simply change the impeller; the broken-off bits must be cleaned out of the system to restore free flow of seawater.
Failed impeller: We just discussed this, but there’s more to say about it. The rubber raw-water impeller is a wear item. Some people change theirs annually; others go several years on a single one. It’s a matter of risk tolerance, but in the final analysis, impellers are cheap and easy to change. We recommend at least annual inspection—and replacement at the slightest sign of wear. You have choices in your replacement impeller. There is a standard black rubber variety, or a blue nitrile one. Nitrile is a synthetic rubber that is more wear-tolerant than standard rubber, and suffers longer periods of being run dry. Which is not to say that you get a pass for running a nitrile impeller dry: do it long enough and it will fail, too. It is good practice to always, after you start the engine, examine the exhaust for a healthy flow of water. If water is not flowing with the exhaust, shut off the engine immediately and check the impeller. If it’s okay, then proceed to the next item.
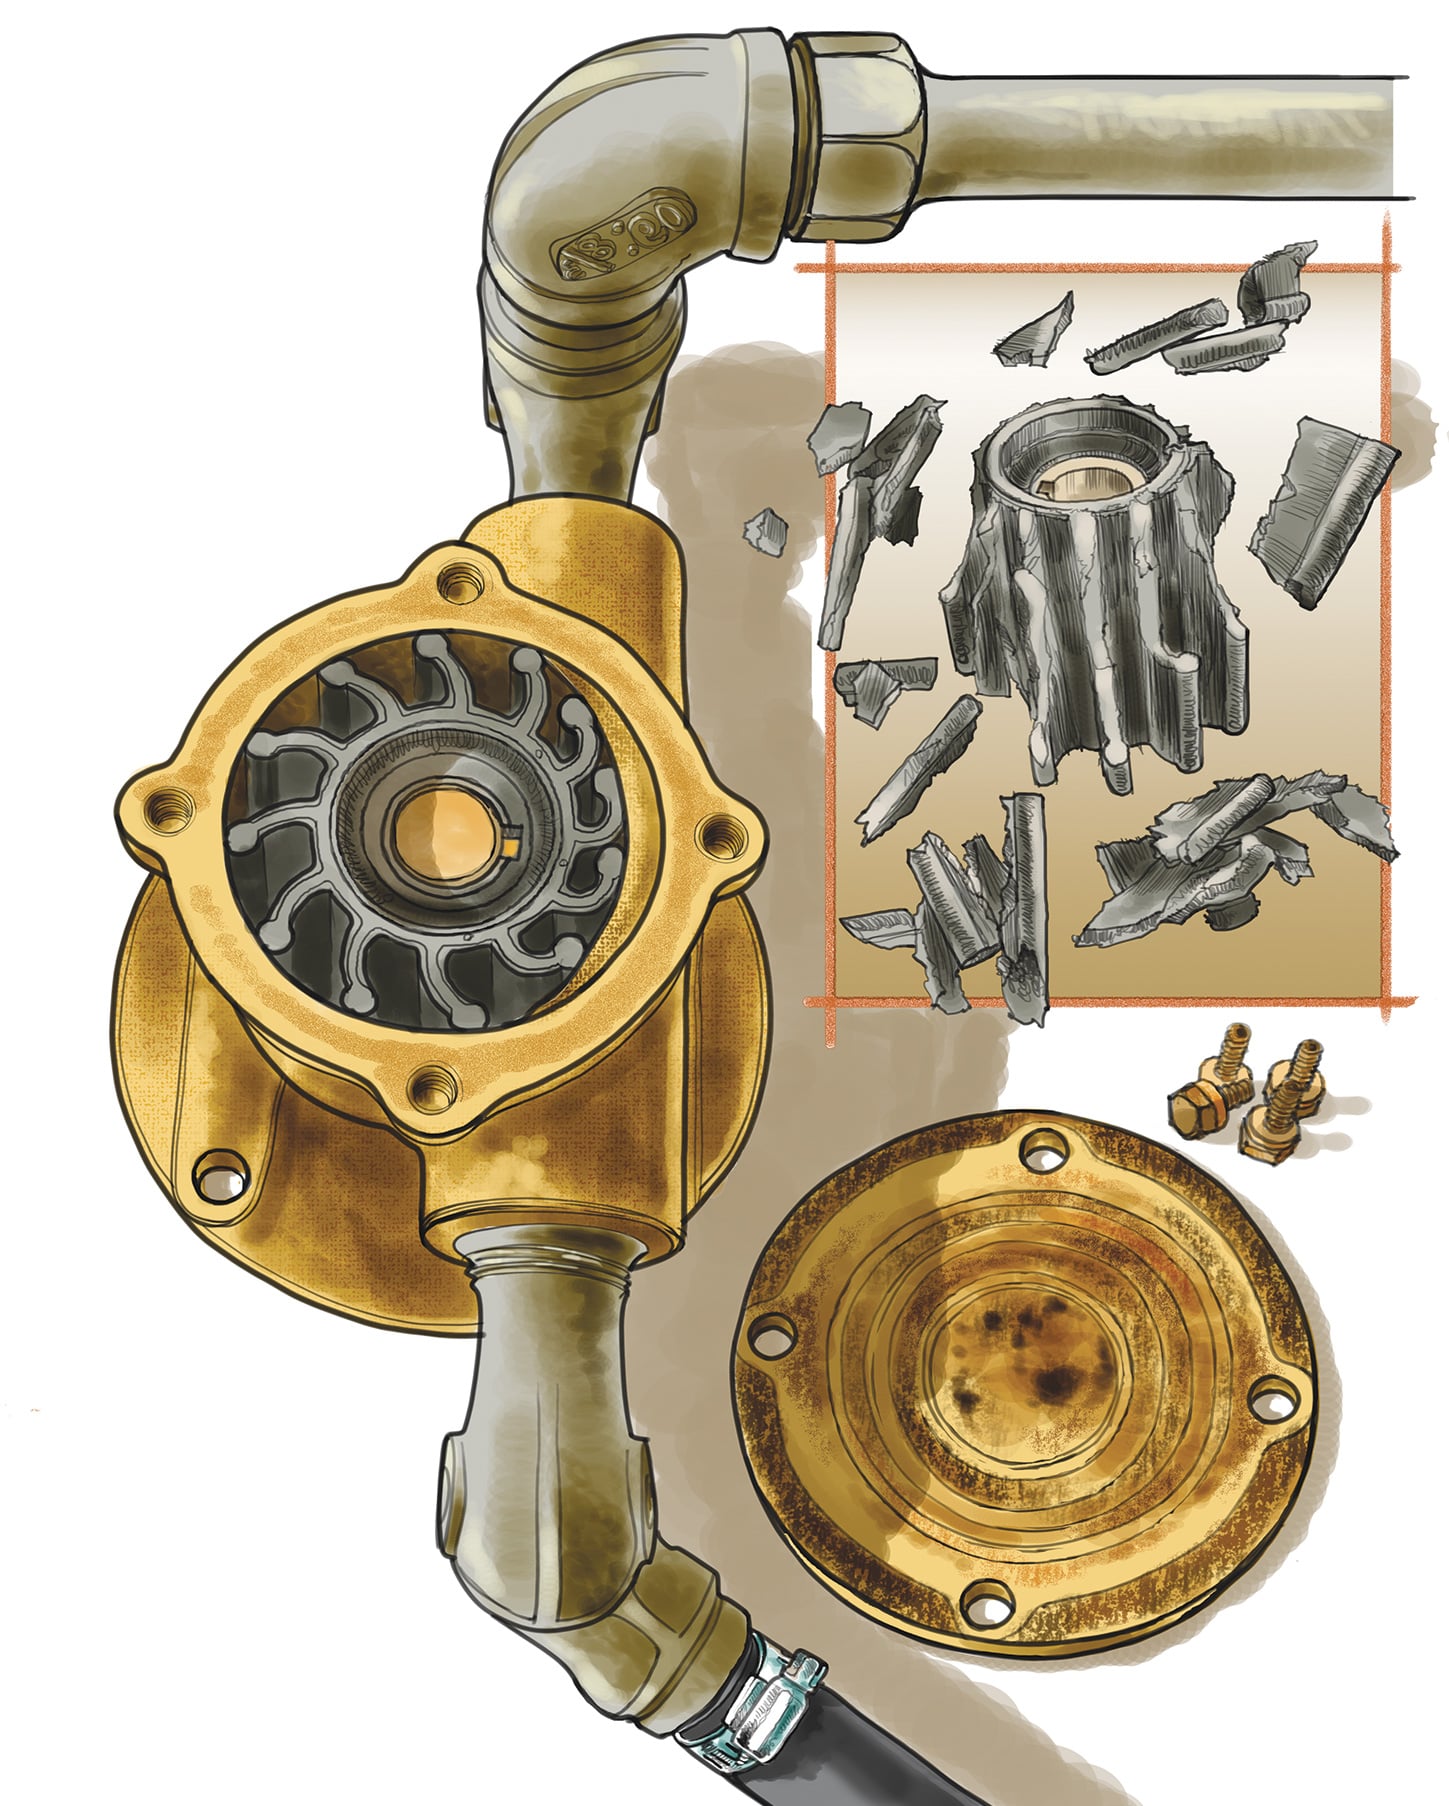
Clogged intake: As mentioned above, there is a coarse screen covering the through-hull fitting of your engine’s raw-water intake. If your engine is overheating, make sure you haven’t sucked a stray plastic bag or clump of seaweed against this screen. If that’s not the case, go farther downstream in the system, and check the raw-water strainer. This is a transparent filter that looks a little like a primary fuel filter. Its job is to filter out small particles that get by the coarse strainer on the intake through-hull fitting. It needs regular inspection and cleaning. Close the seacock before you disassemble the strainer for examination.
Coolant leak: If water is flowing freely through the raw-water side of a closed cooling system, but the engine is still overheating, check for a coolant leak. This will be pretty obvious, because polyethylene glycol, or antifreeze, has a distinctive green color and a distinctive sweet smell (it is also lethal, so keep it away from pets and children). Its appearance and odor typically signifies that something is wrong. A leak may be due to a burst hose, a failed pump, a loose clamp, a compromised heat exchanger, or, worst of all, a cracked engine block.
Stuck thermostat: The engine’s thermostat is a temperature-controlled valve that allows coolant to flow through the engine only after the engine has reached a certain temperature. And it maintains that temperature by closing if the engine becomes too cool. Thermostats, after long periods of sitting, can get stuck. Consult your shop manual to remove yours, inspect it, and replace it if needed.
A Spun-Bearing Allegory
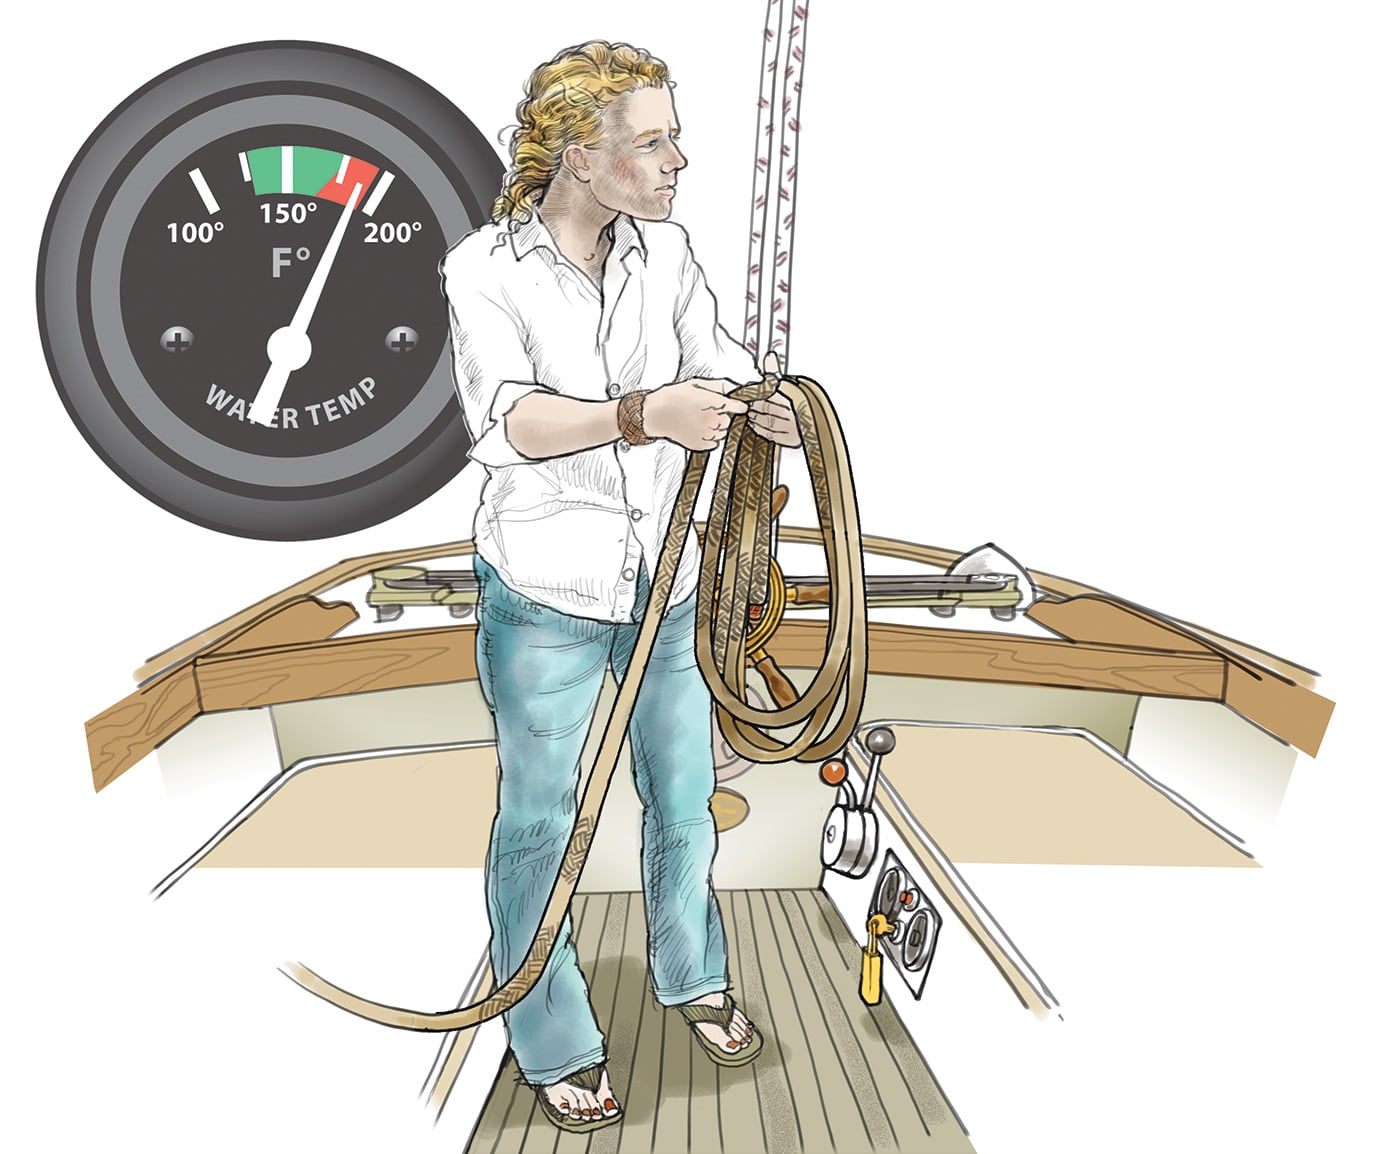
It was a sparkling early June day several years ago when I launched my 33′ yawl. I had changed the oil in the boat’s Volvo MD2—an old, heavy, slow-turning 15-hp workhorse of a diesel engine that I was convinced would last forever if I kept up with the oil and filter changes. I had changed the oil in the shed, and started the engine upon launching, to top off the batteries. I made the all-important check for cooling water discharge with the exhaust, and then blithely went about tidying up the deck and bending on sails while the engine purred reassuringly in the background.
About 15 minutes after I had started the engine, my rapture was rudely interrupted by a loud squeal, and then silence. Diesels don’t just stall like that. When set in motion, they like to remain in motion. I made a quick inspection. The engine was (and I do mean “was”) equipped with compression release levers; when they were engaged, the engine could be spun with a removable crank, allowing it to be hand-started. I tried this, but the engine would not spin.
I went home that evening and did some research on the web, and discovered that it was a common problem with these engines for their oil pumps to lose prime after an oil change. I had never heard of such a thing, and hand-priming them was a laborious and messy task. But it didn’t matter: That was the likely culprit, and the damage was done. The squeal was a bearing welding itself to the crankshaft and spinning within its housing at the big end of the piston rod. The repair, if there were to be one, involved removing the crankshaft, turning it on a lathe to eliminate the damaged areas (this was a two-cylinder engine, and we can assume that both bearings were damaged), and replacing the bearings with oversized ones to compensate for the material lost to the crankshaft repair.
It didn’t make sense, economically. Although this old engine had its charms, parts for it were rare and obsolete, and thus obscenely expensive. I sailed that summer with no engine—a surprisingly joyful learning experience that tested all sorts of skills and resources. And I lucked into a good replacement engine the following winter—and learned something about installation in the process.
I also learned something about the importance of gauges and alarms. The engine had had no oil pressure alarm, and I’d been complacent about monitoring the gauges as I was tidying up the deck on that fateful spring day. I’m not anymore. An oil pressure alarm is a critically important piece of equipment. And scanning the gauges at a regular interval is a likewise important practice.